Saying ‘Hello, World’ in TEI XML
This is the final part of the “TEI Editor’s ‘Hello, World’ Exercise.” It brings together everything from the previous three posts (‘Hello, World’ for TEI Editors, Installing your XML Editor, and Work Safely by Storing All your Transcriptions in a Git Repository.
In this lesson, you’re going to learn about the key parts of your XML editor and Git client and the basic tasks that you will be performing on a daily basis. These include:
- setting up a project workspace in your XML Editor
- creating a valid TEI XML document from a template file
- editing a transcription
- validating it against a TEI schema
- saving your file to your local hard drive
- Committing and pushing it to your Git repository on GitHub.
The successful completion of this post establishes that you have:
- properly installed and configured your XML editor and Git Client.
- the core skills necessary to create a valid TEI document and to store it in a GitHub repository.
You’ll then be ready to start the real work: learning how to code in TEI XML and transcribing your materials.
1. Create a Project workspace
Most advanced code editors have a built-in facility to help you to access and manage all your project’s files and folders. The name for this facility varies, but it’s typically called something like a ‘project folder’ (Atom), ‘project file’ (oXygen XML Editor) or ‘workspace’. These ‘workspaces’ also let you perform certain actions across multiple files or even an entire directory in one fell swoop, such as a global search and replace or, in the case of oXygen, validating multiple transcriptions. What’s important for the purpose of this exercise is that they also make it easy for you to create new TEI files from ‘built-in’ template files.
To create a project folder/file in:
Atom
- Go to File > Add Project Folder. In the dialogue box that opens, navigate to the folder that holds the pointybrackets-exercises repository you created earlier and select it. Click Open.
- You should now see the project panel on the left hand side of your window.
- You can hide the panel by positioning your pointer on the border of the panel around the middle and clicking on the < icon that appears.
- You can reveal the project panel by placing your cursor on the left hand edge of the window around the middle and clicking on the > icon.
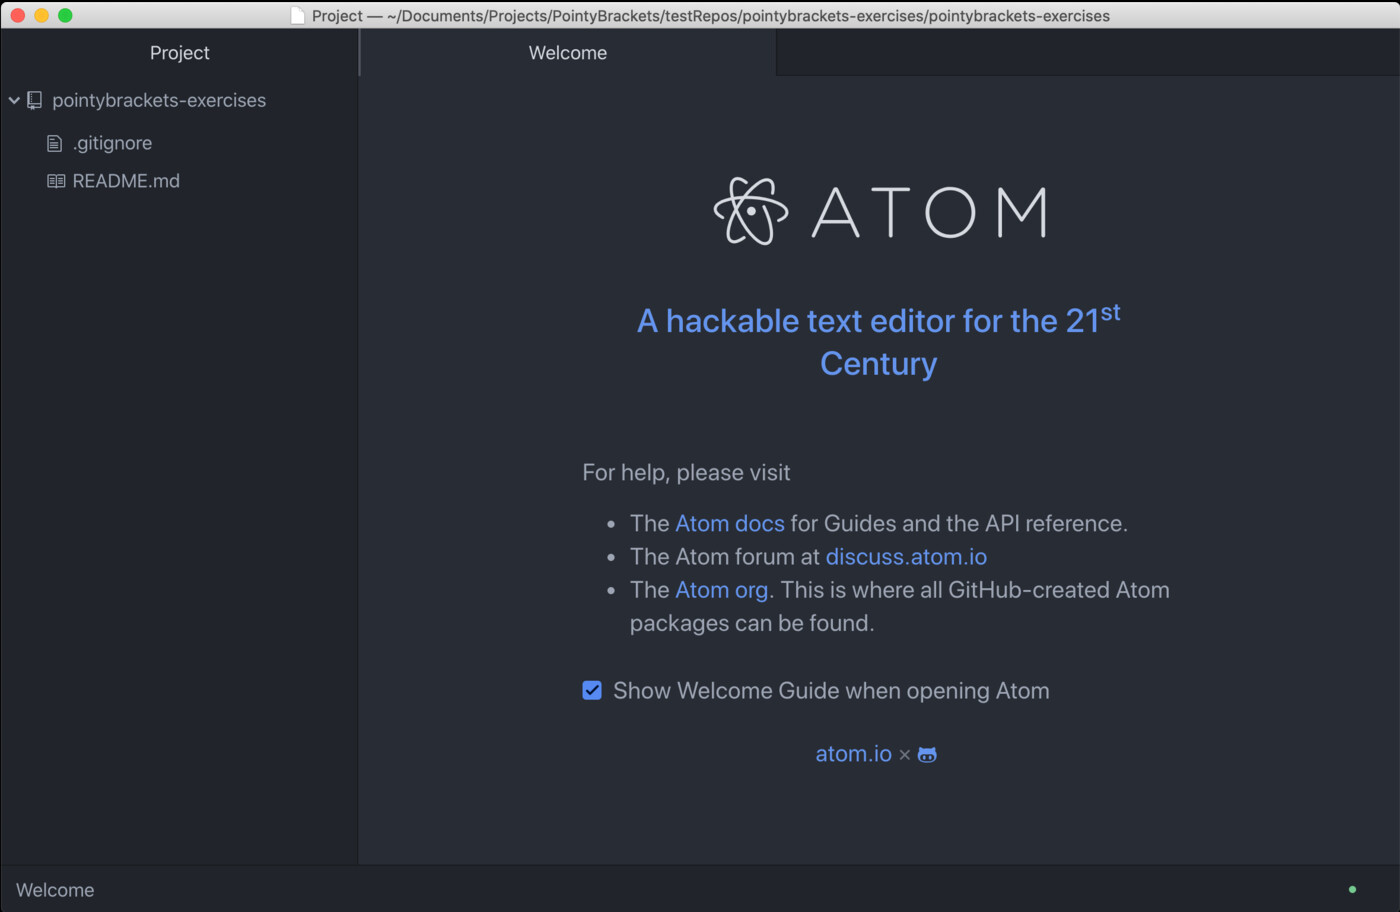
Atom Text Editor’s project panel
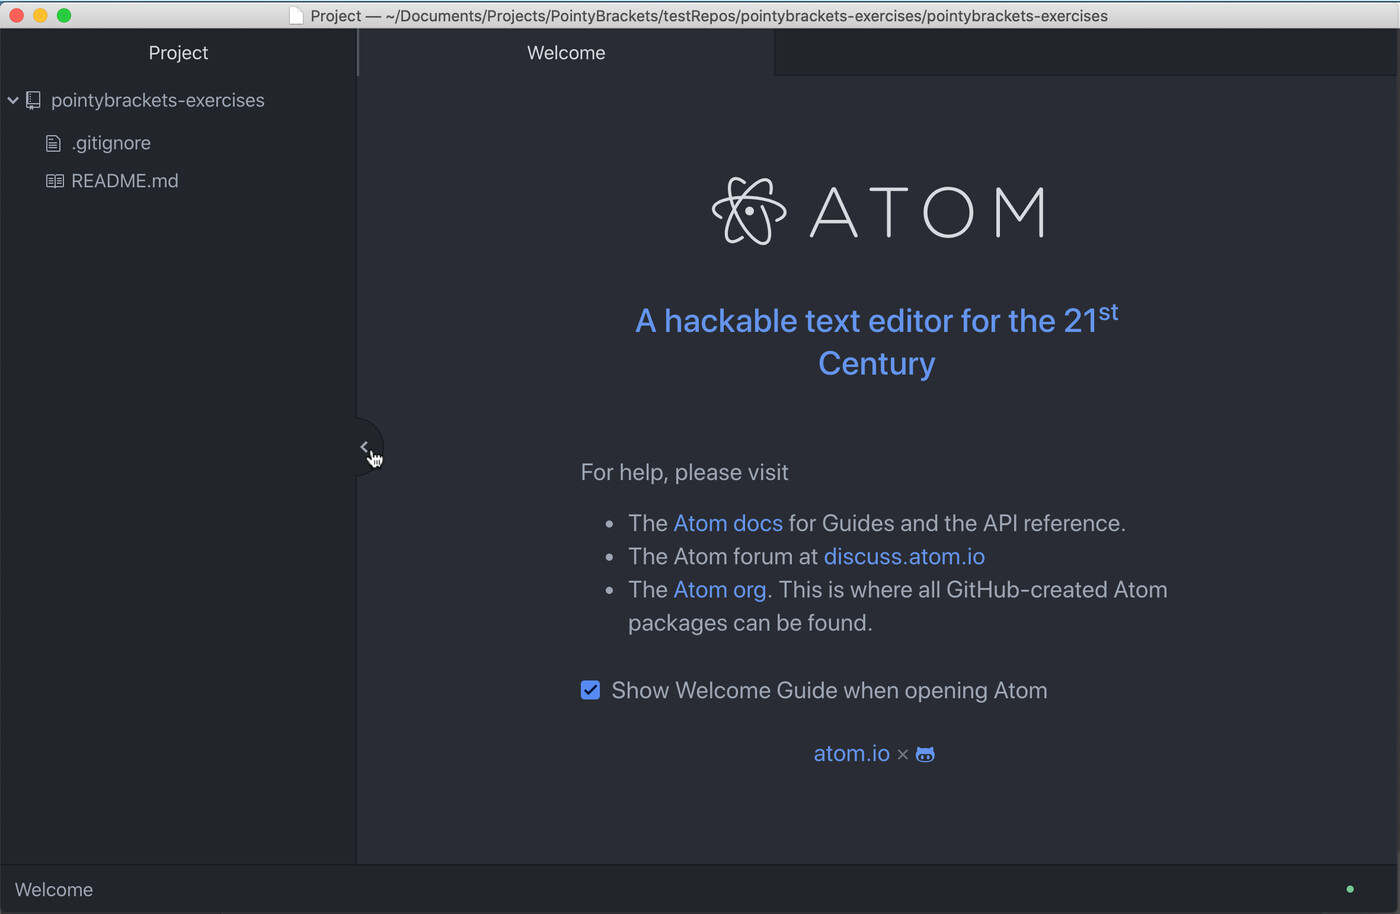
Hide the project panel in Atom Text Editor
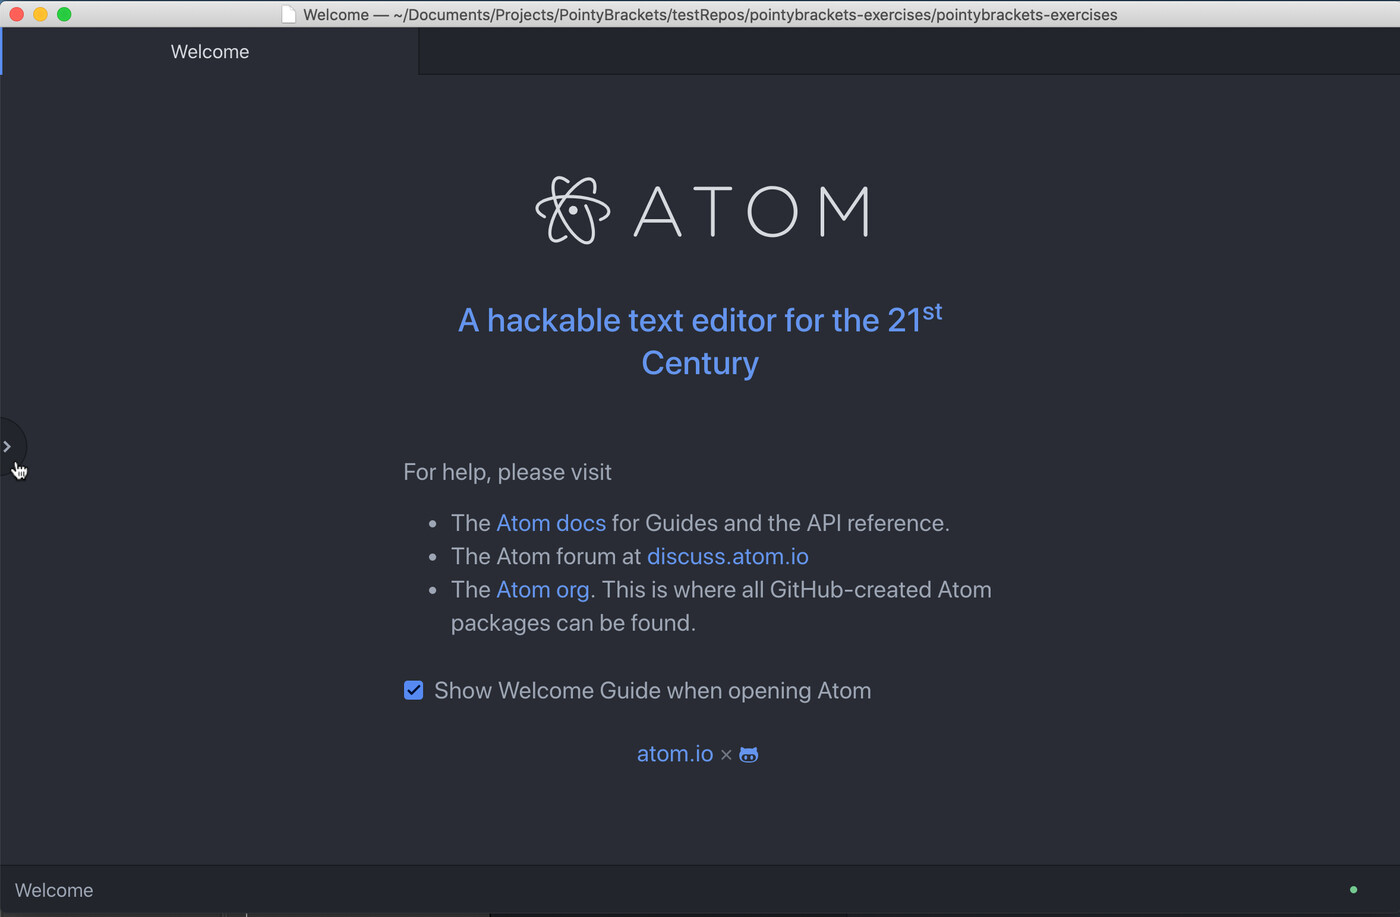
Reveal the project panel in Atom Text Editor
oXygen
- Go to Project > New Project. In the dialogue box that opens, type in the name of the project file in the Save As field, such as pointybrackets.xpr, and save this file inside the pointybrackets-exercises repository you created earlier. The project panel should appear on the left side of the window.
- You can hide the project panel by clicking on the panel’s yellow button (or thumbtack icon if on Windows).
- To reveal the project panel, hover your cursor over the project tab on the left side of the window and then click the yellow (or thumbtack) button when the project panel appears. Alternatively, you reveal the panel by select Window > Show View > Project and then click on the yellow (or thumbtack button) when the panel appears.
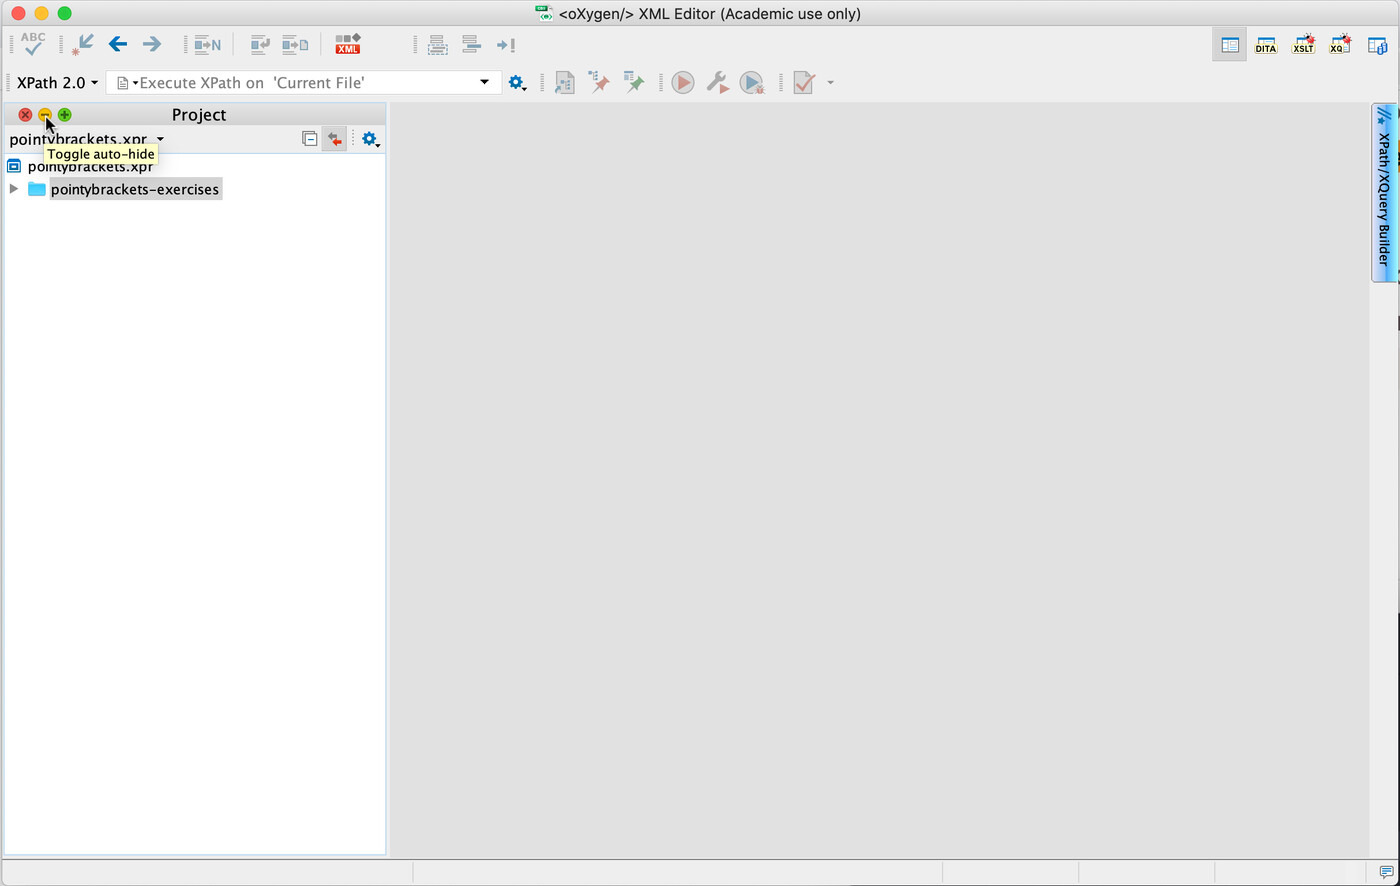
Hide oXygen XML Editor’s project panel by click on the yellow (or thumbtack) button
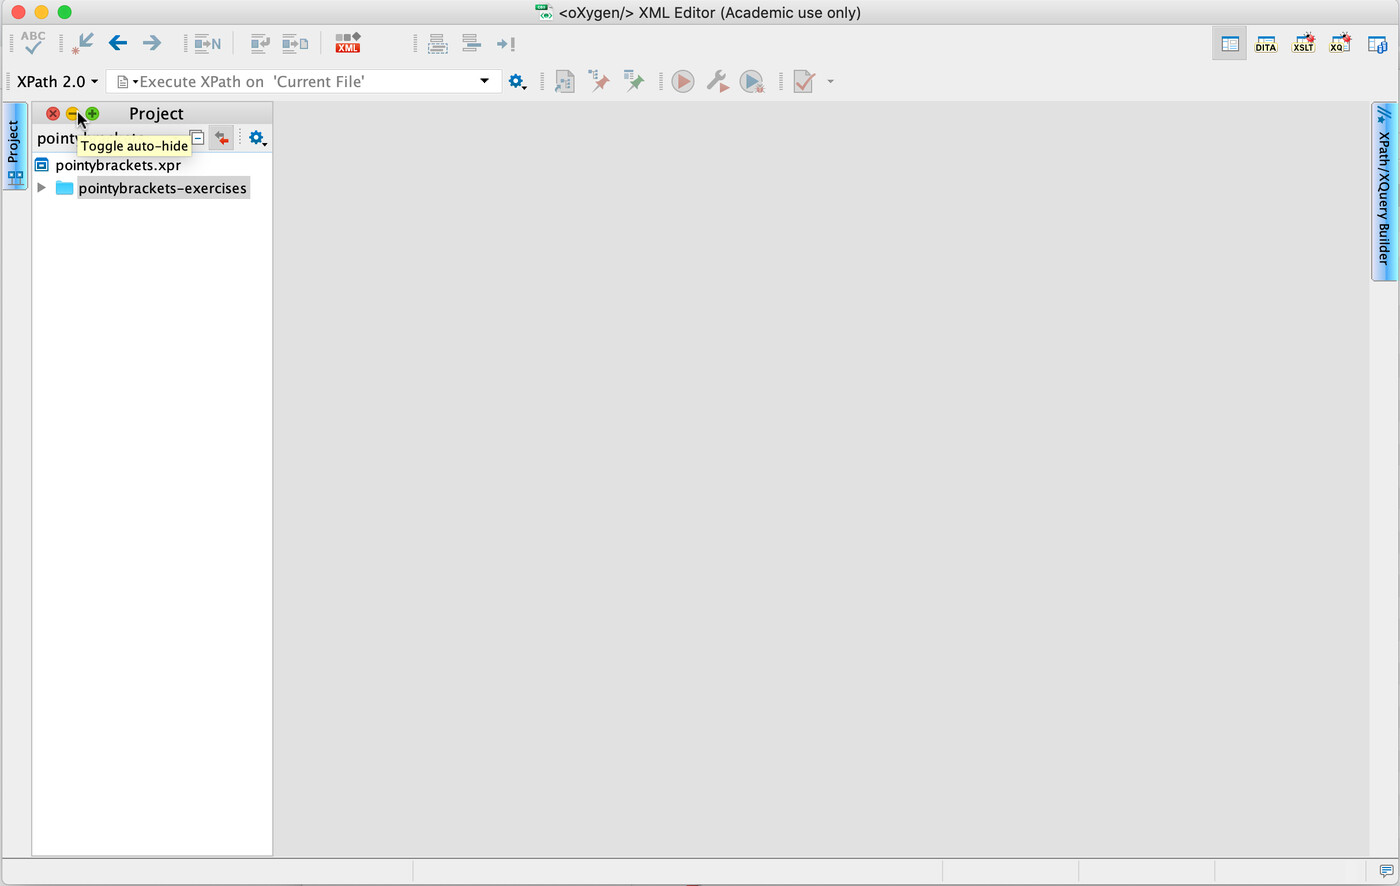
Reveal oXygen’s project panel by hovering over the project tab on the left and clicking the yellow/thumbtack button
2. Create TEI file from a template
All TEI files have broadly the same core structure.
- At the top of the file there are several lines called the prolog. They define various aspects of the XML file itself, such as its character encoding and the schema associated with its XML content.
- The prolog is then followed by the file’s actual XML contents, usually a
<TEI>element with two children: a<teiHeader>defining various bits of metadata about the file and its source, and then some content, often but not exclusively in<text>.
The end result looks something like this:
<?xml version="1.0" encoding="UTF-8"?>
<?xml-model href="http://www.tei-c.org/release/xml/tei/custom/schema/relaxng/tei_all.rng" type="application/xml" schematypens="http://relaxng.org/ns/structure/1.0"?>
<?xml-model href="http://www.tei-c.org/release/xml/tei/custom/schema/relaxng/tei_all.rng" type="application/xml" schematypens="http://purl.oclc.org/dsdl/schematron"?>
<TEI xmlns="http://www.tei-c.org/ns/1.0">
  <teiHeader>
      <fileDesc>
         <titleStmt>
            <title>Title</title>
         </titleStmt>
         <publicationStmt>
            <p>Publication Information</p>
         </publicationStmt>
         <sourceDesc>
            <p>Information about the source</p>
         </sourceDesc>
      </fileDesc>
  </teiHeader>
  <text>
      <body>
         <p>Transcription goes here</p>
      </body>
  </text>
</TEI>
You could type this out by hand every time you start a new transcription, but it’s easier (and safer) to create a new file by duplicating a template file. TEI provides more than a dozen different template files. They are available in oXygen by default and in Atom via the tei-framework package you installed earlier.
To create a new file from a TEI template in:
Atom
- In the project panel on the left of your window, right click (or press ctrl and click if on a Macintosh) on the name of the folder you created for your project (e.g. pointybrackets-exercises) and select Create file from template in the contextual dropdown item.
- Select TEI (All) from the list and confirm that you want to create a new file from this template.
- Atom will automatically create a new file in your project folder with the current date and time as its filename (e.g. 20200426T091825.xml).
oXygen
- Right click on the pointybrackets-exercises folder in the project panel and select New > File.
- A dialogue box will then open for you to choose which template file to use. Expand Framework > TEI and select All [TEI].
- oXygen will automatically suggest creating an untitled.xml file inside your repository. Type in the name that you want and click Create.
NB: Be sure that the file is saved in the pointybrackets-exercises folder that you created earlier. That way, it can be included within your Git repository.
3. Edit the file to say ‘Hello, World’
This part is easy. Scroll down to the line <p>Some text here.</p> and change it to <p>Hello, World</p>.
4. Validate the file
oXygen and Atom should both automatically validate your file and flag if there are any errors.
Atom
- The validation status is indicated by three small icons in the bottom left of your window:
 . The icons respectively indicate validation errors, warnings and info messages. The numbers next to the icons indicate the number of errors/warning/messages.
 - When a file is valid, all three icons will be grey and have a ‘0’ next to them.
- If there are any errors in the file, the leftmost icon will be red:
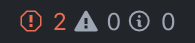 followed by a number indicating the number of errors. You can click the red stop sign to see a detailed error list. The offending lines will also have red dots placed in front of them in the main editor window. The offending element(s) will also have a red underline beneath them.
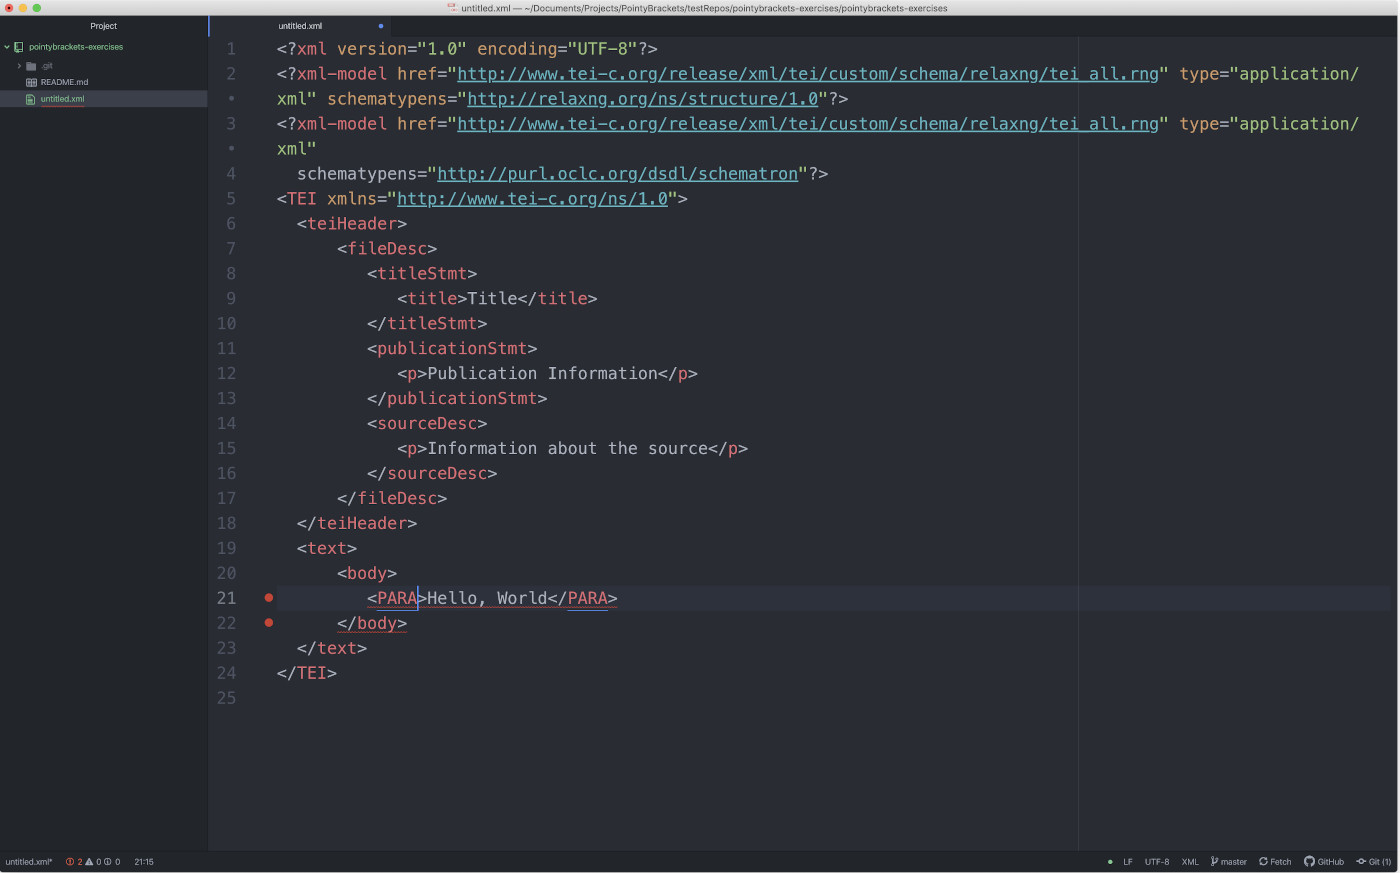
An invalid TEI document in Atom
oXygen
- The validation status is indicated either a ‘
 Validation successful’ or ‘
 Validation failed’ in the bottom centre of your window.
 - Small red bars indicating the position of the offending lines within the document appear to the right of the scrollbar. You can double click on them to scroll to the errors. The problematic elements will also have a red squiggly underline beneath them.
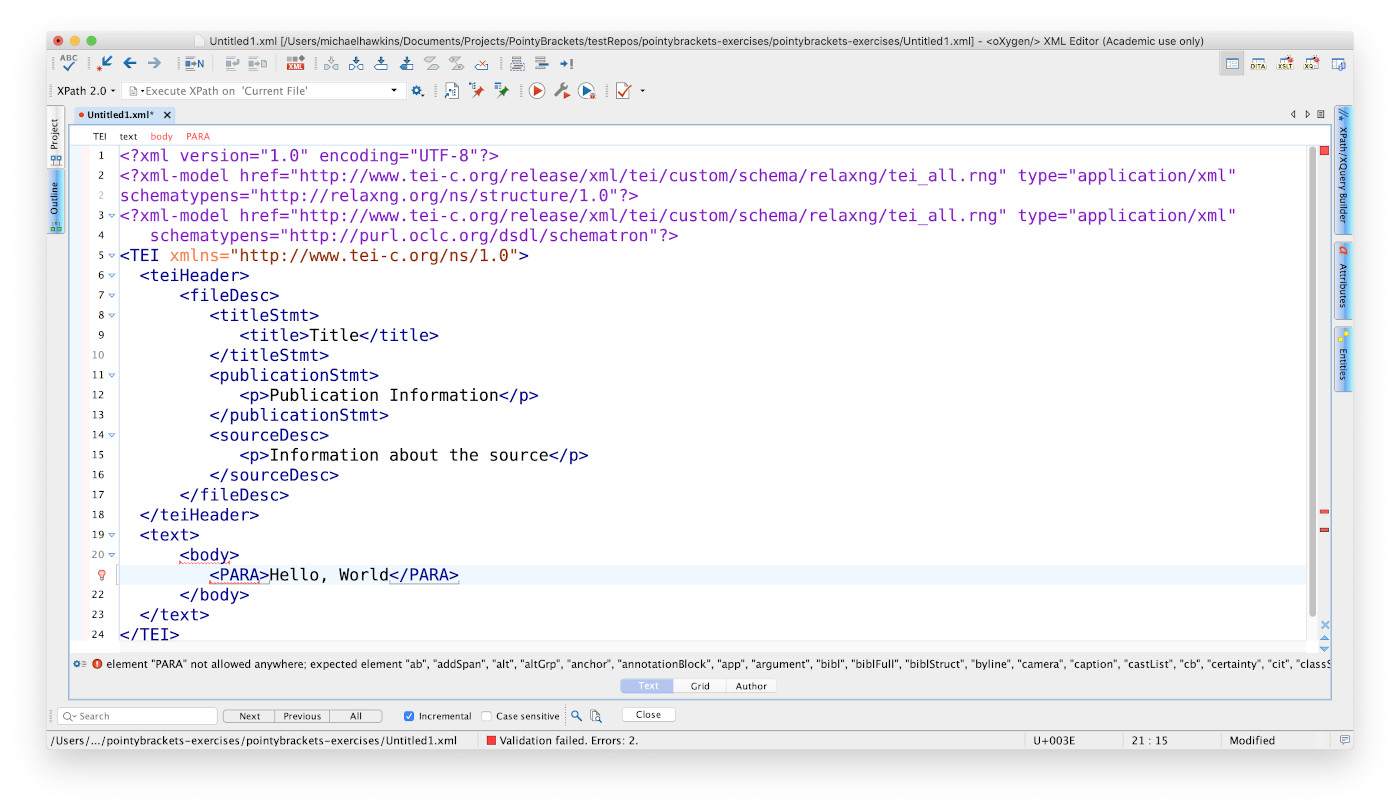
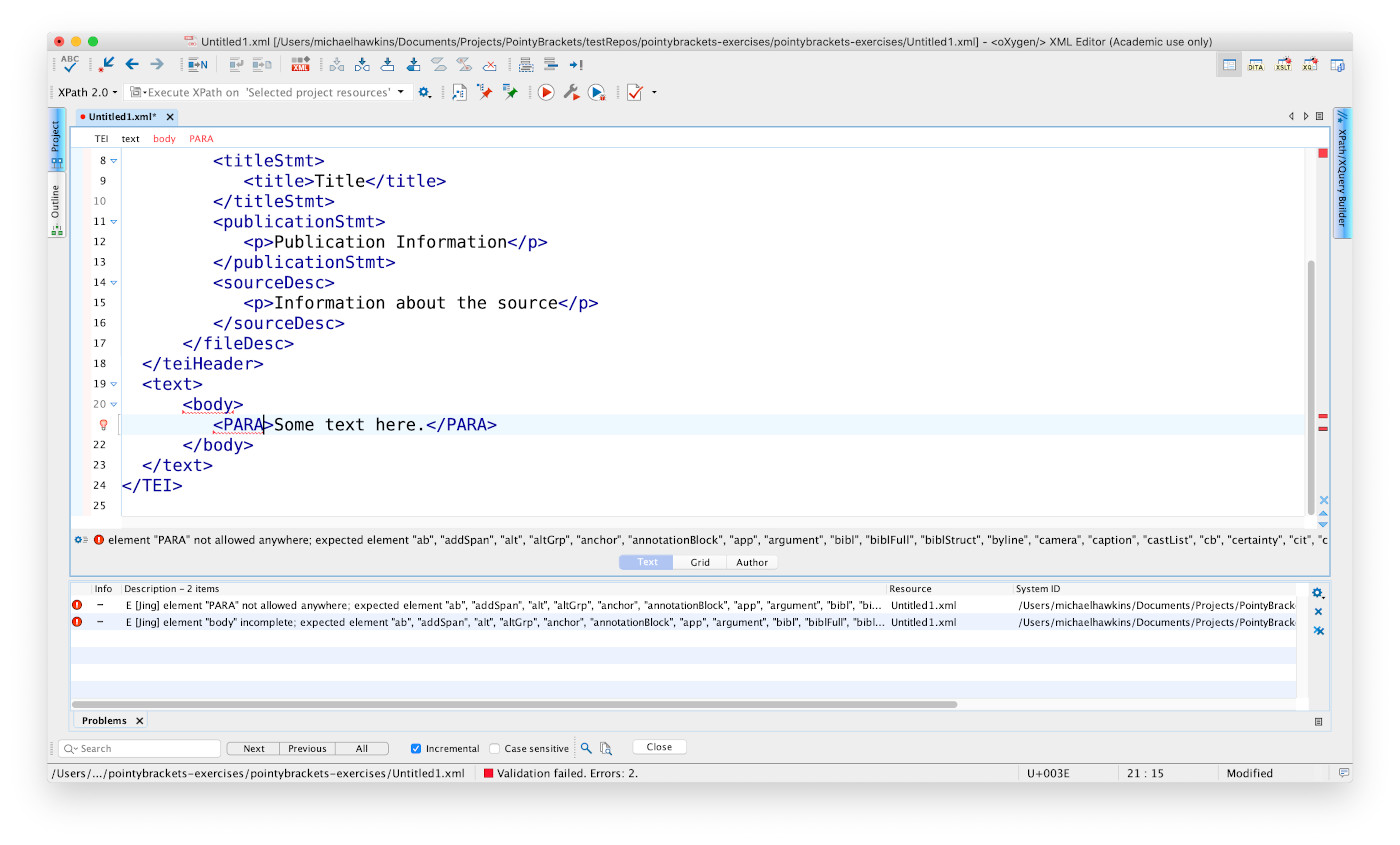
An invalid TEI document in oXygen XML Editor
In oXygen, you can also get a list of all the validation errors by going to Document > Validate > Validate. You can double click on an error message to jump right to that offending element.
See a list of all the validation errors in oXygen by going to Document > Validate > Validate.
Background Validation
The easiest way to see validation in action is to compare a valid document to an invalid one. This also helps to confirm that you correctly installed and configured all the necessary packages if you are using Atom.
Your TEI file is likely valid if you were careful when editing it earlier. However, if there are any validation errors, compare your file to the sample given above and correct it.
Once the file is valid, change Hello, World’s <p> element to one that doesn’t exist in TEI, like <PARA>, so that it reads <PARA>Hello, World</PARA>.
Your editor should now complain that the file isn’t valid. Undo that change until it’s valid again and save the file.
TIP: both oXygen and Atom let you edit the opening and closing tags at the same time. Place your cursor inside the opening tag (i.e. the <p>) in-between the ‘p’ and the ‘>’. Press the backspace key to delete the ‘p’ and type ‘PARA’ (without the quotes). If all went well, the opening and closing tags should both have been updated. Don’t be discouraged if it doesn’t work the first time. It’s easy to ‘hiccup’ your editor’s auto-assist function. Just undo your change and try again. Once you get the hang of it, it’ll become second nature.
5. Commit and Push your file into your GitHub repository
Launch GitHub Desktop
Select Repository > Pull to pull any changes from the remote repository on GitHub to your computer. Don’t worry if it’s greyed out. This means that there aren’t any changes to bring to your machine. If you are working as part of a team, it’s a good idea to always pull the latest changes from the remote repository before starting your work. That way, you’ll always have the latest files on your machine. Even if you’re working alone, it’s still a good habit to get into.
Click on Changes. If you saved your new file within your repository folder, you should see it listed. It have a green plus next to it on the right, indicating that it’s a new file. For the changes to be committed into your repository, you need to ensure that the checkbox to the left of the filename is checked.
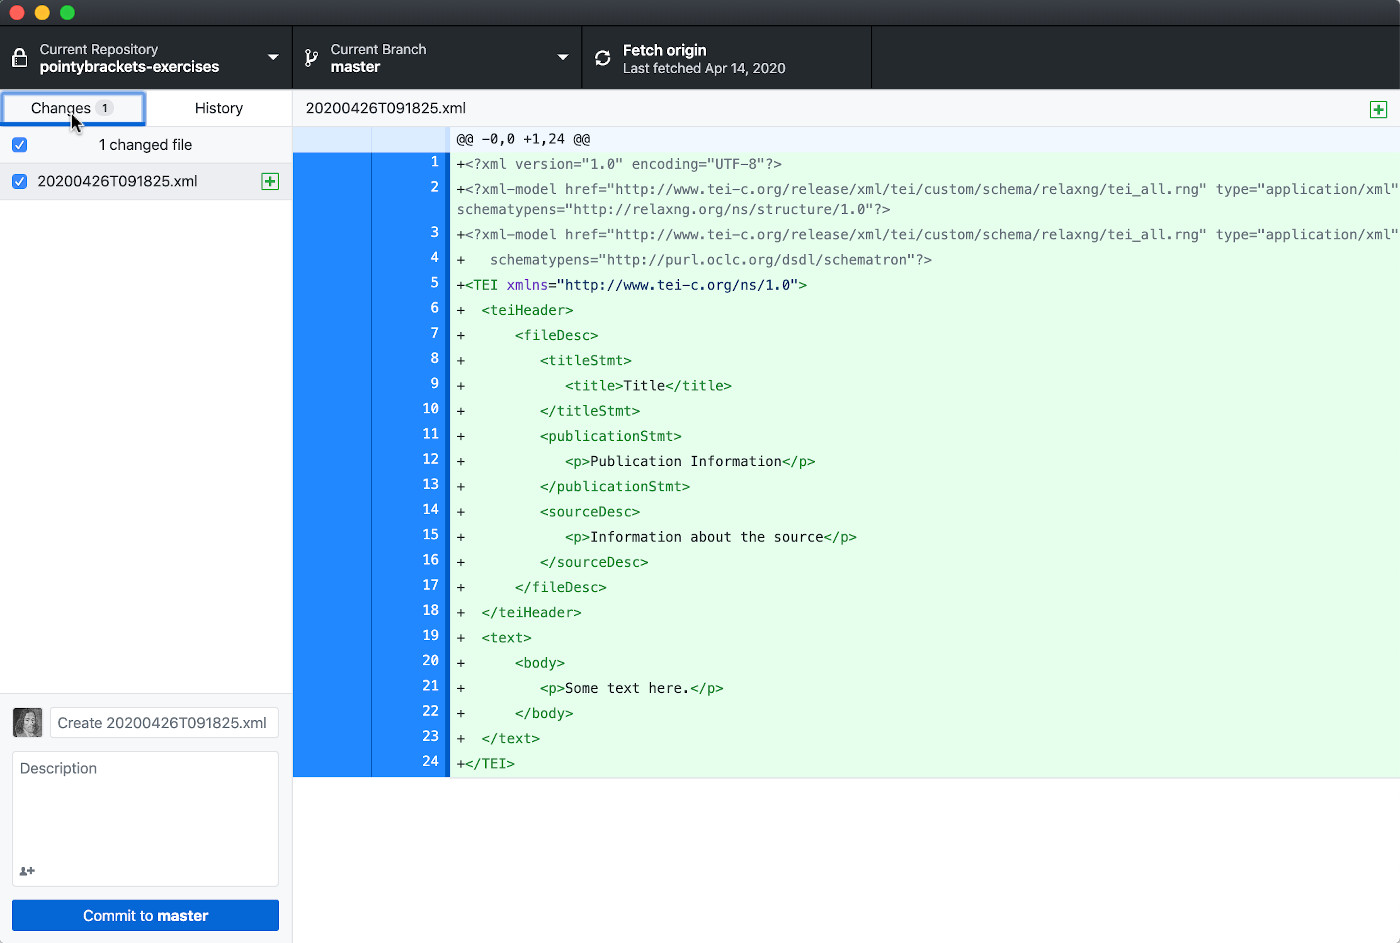
Committing a file in GitHub Desktop
Once you have selected all the files that you want to commit, you need to enter a small summary describing the commit. This is done in a field underneath the file list towards the bottom left of the window. If this field doesn’t already contain something meaningful, enter a short description of your own.
Press the Commit to master button to commit these changes into the copy of the repository sitting on your hard drive.
At this point, your changes only exist in your computer. For them to be both made available to other teammates and backed up remotely, you need to push these changes to the remote version on GitHub. To do this, go to Repository > Push. It may take a few seconds to finish, so be patient.
6. Welcome to your new daily routine
This is the general procedure that you’ll use every day you are working on your files. You’ll:
- Pull the latest changes from the remote repository (e.g. your repository on GitHub) to your hard drive before starting work
- Create and/or edit files.
- Pull the latest changes from the remote repository when you are finished for the day.
- Tell Git which files you want to commit into your copy repository.
- Commit those files.
- Push that commit to your remote repository.
Where do I go from here?
Now that you have the ability to create valid TEI XML documents and to store them in a GitHub repository, the next step is to create a repository for your transcription project and to start learning TEI. There are many ways to do this, such as local events within your University, various summer schools (e.g. Digital Humanities at Oxford) or self-study (using TEI: Learn the TEI or TEI by Example).